After doing quite a bit of research on diaphragm call presses and jigs, I decided to just make my own....I greatly appreciate all the help I have gotten from guys on this forum,, and want to give back some way.....i hope this helps
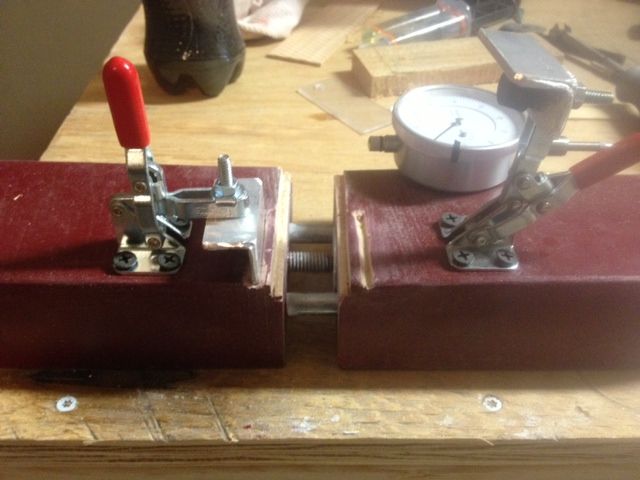
To begin with, i took two blocks of wood roughly 2x4x6 , and ripped 3/4" off one of my blocks...so now i have a 2x3.25x6 block
Then i took my other block and cut a 3/4 notch out of it , this is what my peice of 3/4 bar stock mounts on.

This is a displacement gauge, you can buy them with various mounting options, but this one had a mounting configuration as shown...so i mounted it to the side of my block.... It is mounted on the block that stays still, not the block that moves.
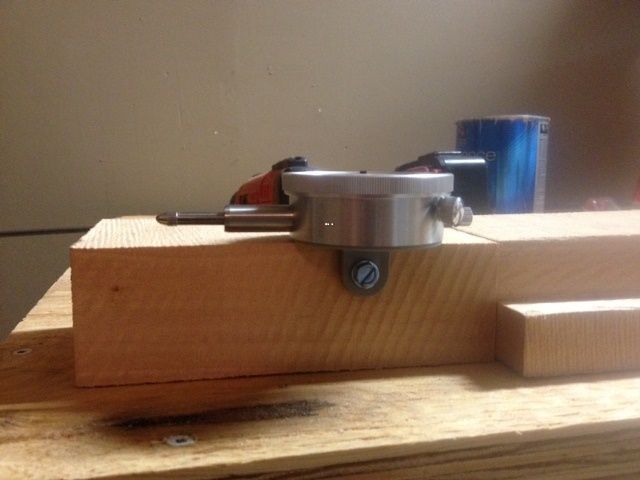
Now you can see how i mounted the bar stock to ride the moving block and move the displacement gauge accordingly....
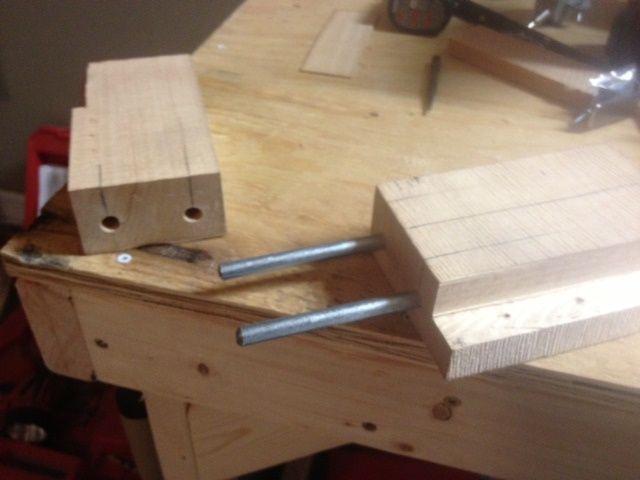
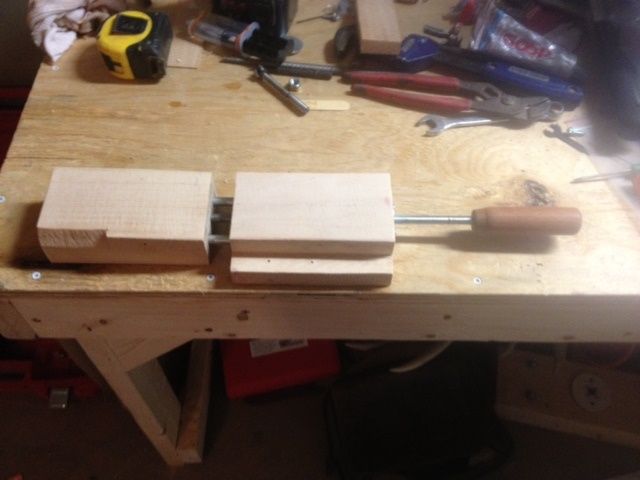
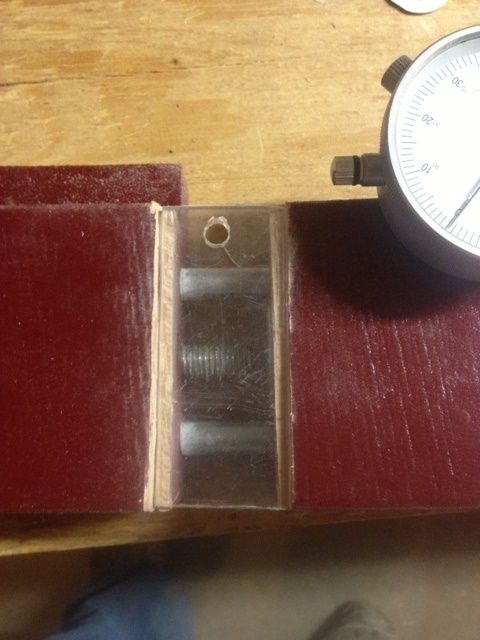
The next thing i did was get some 3/8 rod, and cut myself some tracking bars....this is what keeps the jig aligned while moving in and out....so i measured my holes and drilled them out, and glued my rod in the moving block
I then took and drilled a 3/8 hole all the way through the moving block, this is for my 3/8 all-thread that will be used to crank things apart, this is also on the moving block side of the operation....
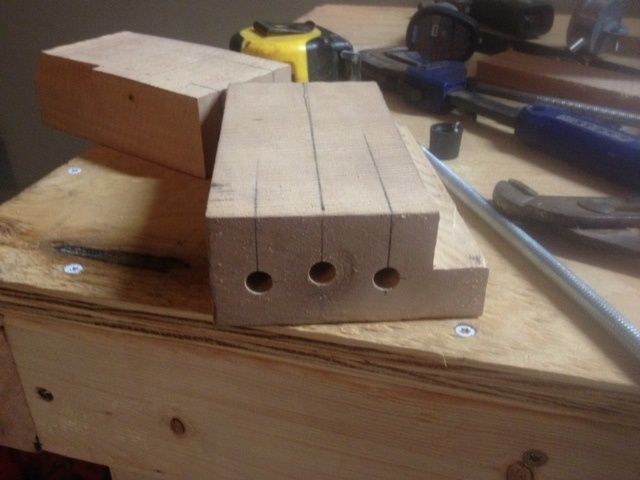
I then took and drilled a 5/8 hole to countersink a nut on both ends of my all-thread so that the all-thread has a means of threading....
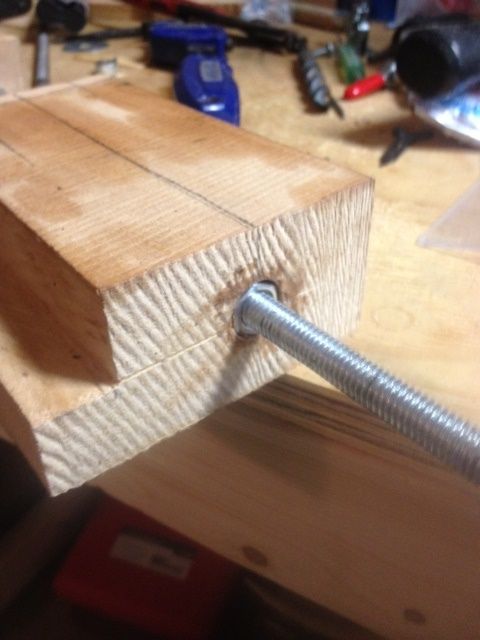
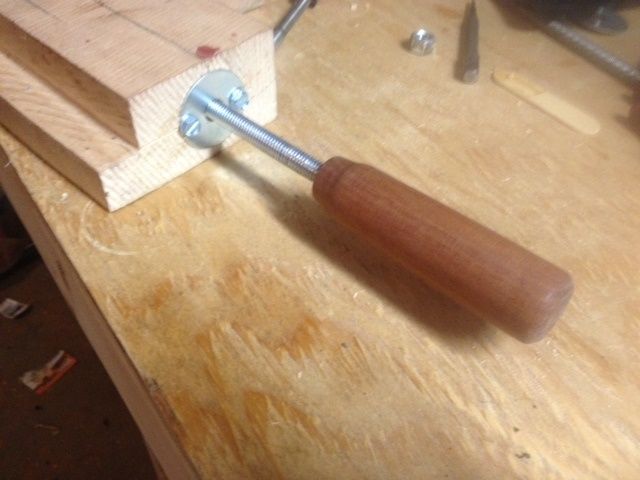
Here i used a 3/8 fender washer just as added protection to keep the nut from moving, it presses up against the back side of the nut.....Also i turned down a handle and tapped it with a 3/8 thread and glued it up to my all-thread
Here is what it looks like up to this point in the game, notice there needs to be a notch taken off of the stationary block to allow the bar stock enough room to slide back and forth to run your gauge
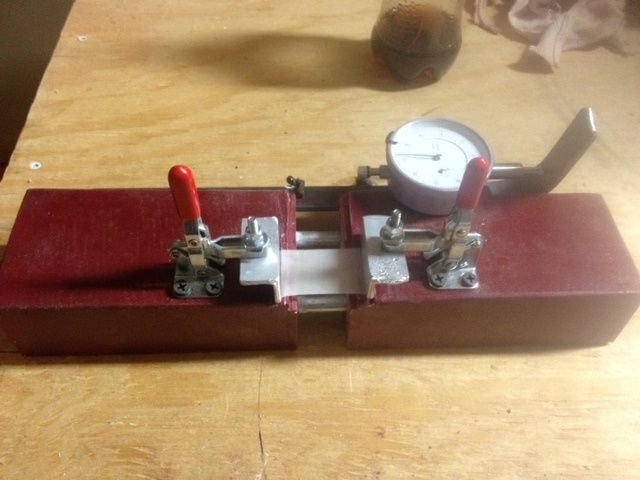
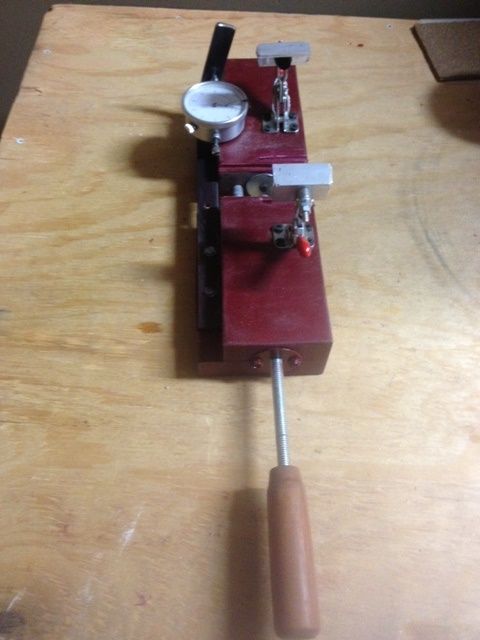
I then painted it, just for looks, and mounted my gauge, and my toggle clamps..... i cut down some aluminum angle and mounted it to the toggle clamps...and then cut receiving grooves into the blocks for the clamps to seat the latex in
I had a broken drafting square laying around and cut it to use here for the latex to lay on while the blocks are apart.....this required an 1/8" notching on both blocks, when the latex begins to stretch the plastic comes out
Here are a couple angles of the finished product.....
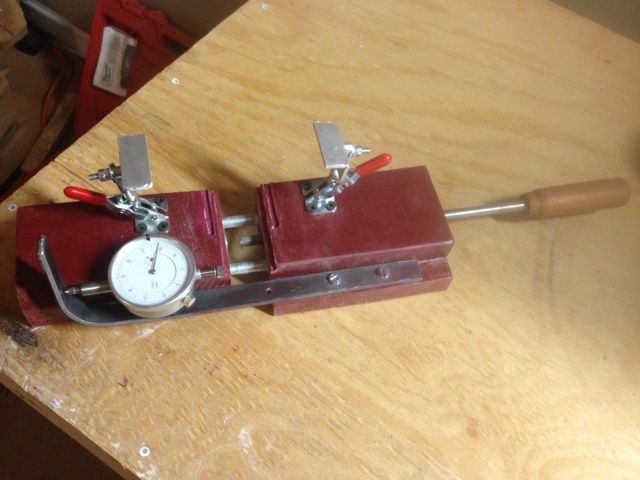
Here is what its all about.....stretching that latex