Basic Tutorial for Making a Firepiston
By Bushbuck SA
The firepiston, sometimes referred to as a fire syringe, is an ancient fire making technique. These fascinating tools were found in archaeological diggings in South East Asia dating back 1000 years or so. It works on the principle of Boyles Law i.e.: P/V=T . An increase in pressure and subsequent decrease in volume causes a drastic rise in temperature. This rise in temperature in the context of the firepiston is sufficient to ignite a combustible material contained in the piston. The construction is relatively simple in that it consists of a cylinder, piston and a knob or handle.By Bushbuck SA
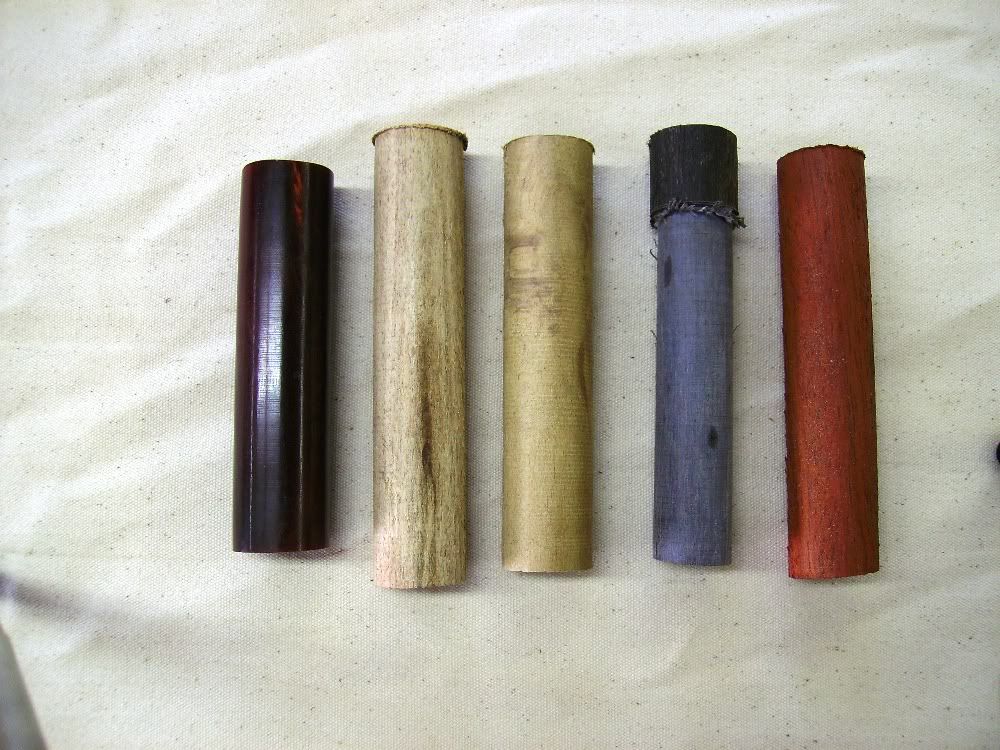
The firepiston, sometimes referred to as a fire syringe, is an ancient fire making technique. These fascinating tools were found in archaeological diggings in South East Asia dating back 1000 years or so. It works on the principle of Boyles Law i.e.: P/V=T .An increase in pressure and subsequent decrease in volume causes a drastic rise in temperature. This rise in temperature in the context of the firepiston is sufficient to ignite a combustible material contained in the piston. The construction is relatively simple in that it consists of a cylinder, piston and a knob or handle. The wood must be dense and close grained without any cracks. This is very important. The tool in use generates very high pressure and a crack could result in a burst cylinder and possible injury to your hand. You could also use mycarta, nylon, or similar. Stay away from Plexiglas. It shatters.
I always start with the cylinder first. Cut and rough turn a blank 5½ long by 1¼ square. The aim is to end up with a cylinder about 1 in diameter.
Put the blank in the chuck and bore a 5/16 hole in diameter and 3 deep. I then face the bottom of the hole with a corresponding size end mill. You lose pressure if you leave the profile created by the tip of the drill.
Next comes polishing of the cylinder. This is the most critical part of the whole process. You have to get a perfectly smooth parallel finish. I wrap water paper around a dowel stick the full 80mm and with the lathe running, pass the stick into the cylinder and hold it as steady and precisely as possible. Start with 320 grit and progress up to 1200 grit. In this process, you must ensure that you dont remove more than about 1/16. The idea is to end up with a perfectly smooth parallel hole 3 deep.
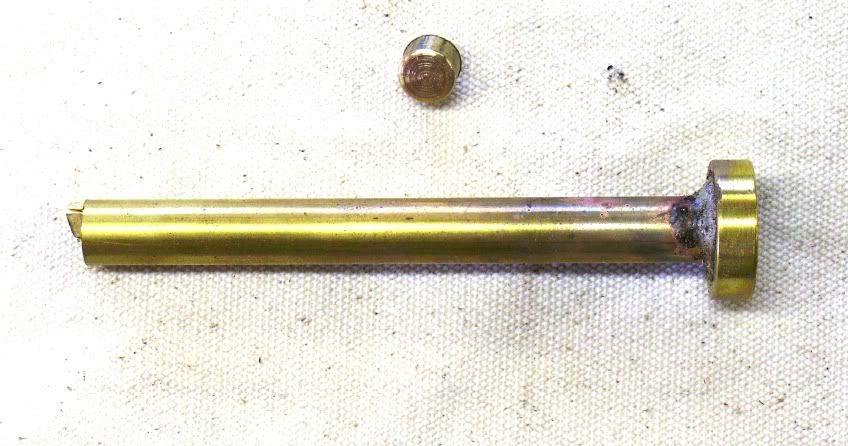
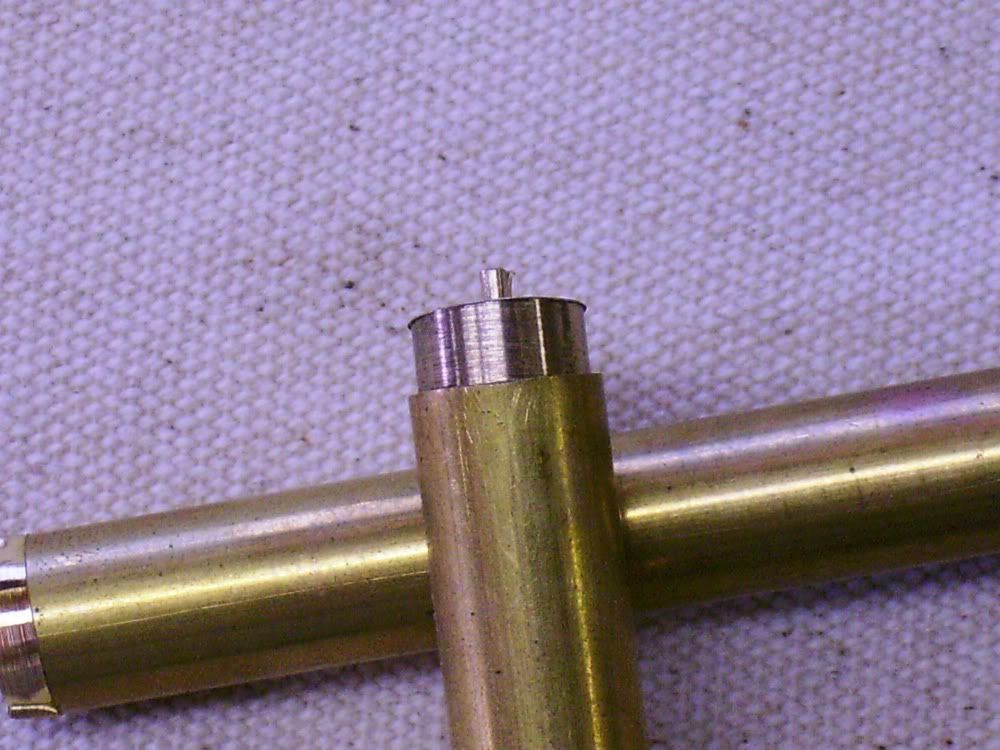
Alternately, drill the hole to accept a brass sleeve that would act as the bore. This is a lot less work as the chore of sanding a perfectly smooth bore. The sleeve needs to be plugged. Soft solder a brass plug, the same as the inside diameter as the tube and ¼ long, into the end of the tube. Then epoxy the tube into the wood.
The piston is simple. Cut a 5/16 dowel of the same or any wood that would match the cylinder. You need to have it about 4¾ long to allow it to be glued into the knob later. Only use a hard wood. Softwood will just burst. Next, bore a 3/16 hole into the tip of the dowel about 7/32 deep. I use a round end mill to do this as it creates a nice little bowl that will make it easier to scratch your tinder from later.
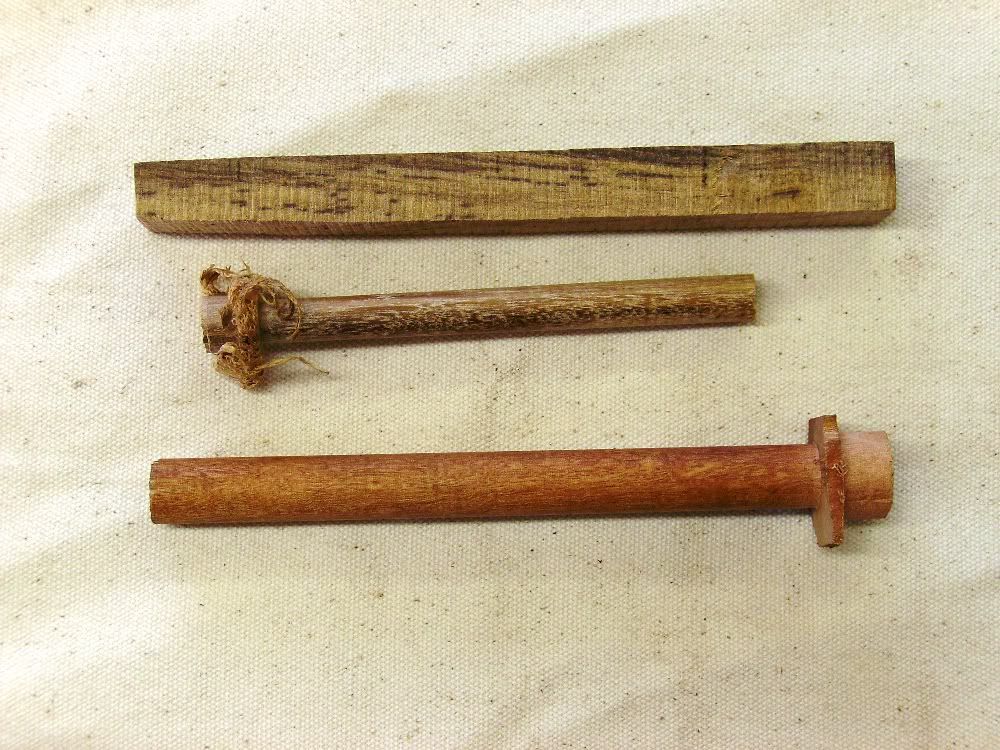
Next is to cut two grooves into the same end of the piston to accommodate the O rings. I have ground a tool for the job. I use 5/32 x 1/16 rings. You need to cut the grooves just deep enough so that there is enough ring protruding to create the seal. Traditionally, a thin cotton cord was wrapped around the tip of the piston and smeared with tallow, to act as a seal. I have made these before but they are very high maintenance so for practicality sake, go with the O rings.
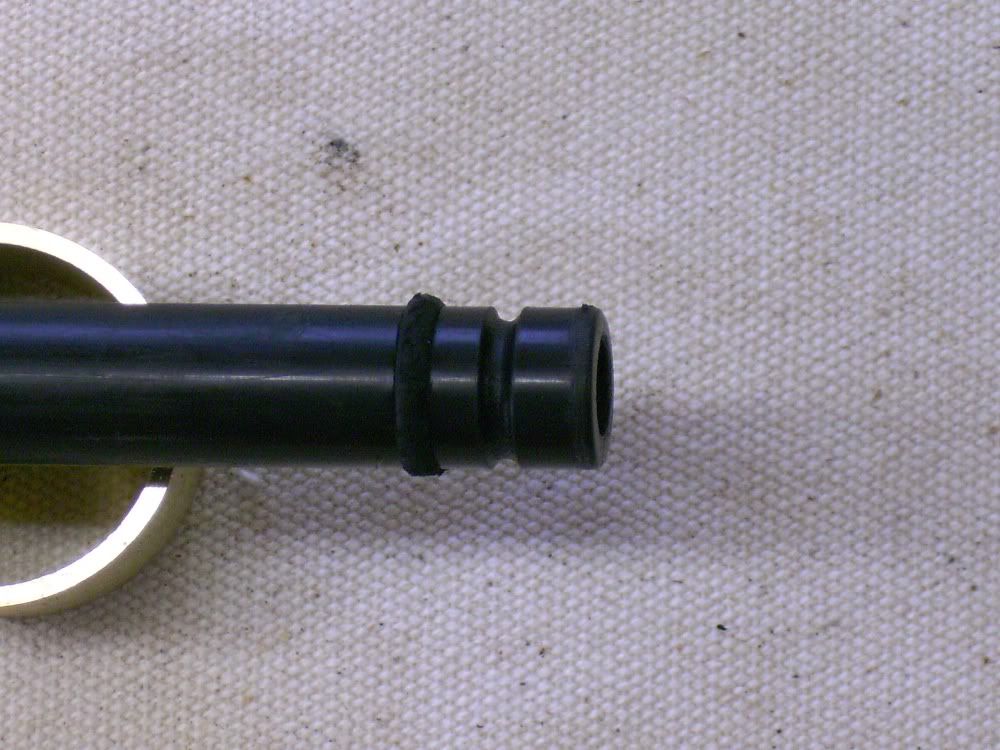
Before you put the rings onto the piston, put the piston into the cylinder to make sure it fits snugly. While you are about it, mark the depth of the cylinder onto the piston with a pencil. You will need that mark later.
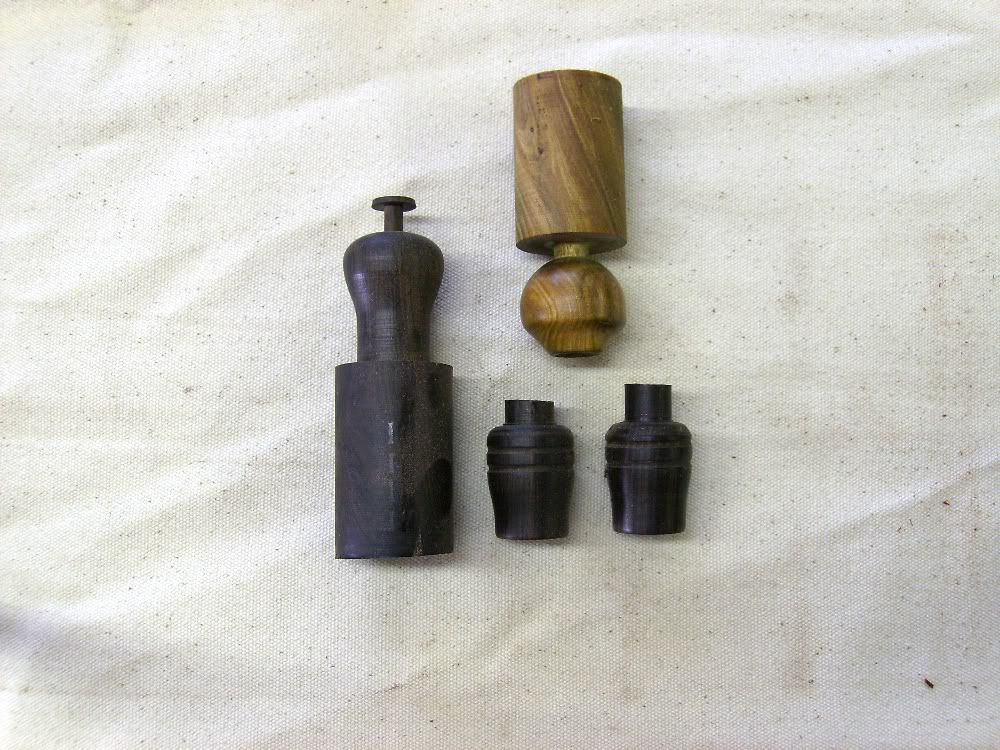
Now make a knob. Make the top surface big enough so that it doesnt hurt your hand when you strike it. Normally, 1¼ is good. You can play around with shapes etc. The one end has to be bored 5/16 to accept the piston, which you can now glue onto the knob. Your mark now comes into play. The piston has to be seated .25mm past the edge of the knob, thus giving you a piston of 79.75mm. This is to ensure that the piston does not bottom out in the cylinder when it is used.
I always now check to see if the thing works well now before I spend time shaping and polishing the cylinder and knob. Put plenty of Vaseline (petroleum jelly) onto the seals and work the piston into the cylinder to coat it with lubricant. The piston should make a popping sound when you remove it from the cylinder.
You will have to make some char cloth. Do this by burning some pure cotton T-shirts material in an old clean Qt paint tin. Punch a small hole in the lid of the tin to allow gas to escape. Pack the material into the tin and close the lid. Set the tin on a fire or gas burner. It should start burning and produce lots of white smoke. Dont do this in your wifes kitchen. You will get skinned! Wait for it to stop smoking and then take the tin off the flames and set it aside to cool. DONT open the tin when it is hot. The cloth will burst into flames and destroy your char cloth.
Take some of your char cloth and put it into the bowl, lubricate the seals with Vaseline, push the piston into the cylinder a little way and strike the knob with a sharp blow. You then have to remove the piston from the cylinder as fast as possible to avoid smothering the ember. Removing the piston and striking the knob has to be one fluid action. You will get the hang of it
Now have fun shaping and polishing the cylinder and knob. I use a brass mandrel that has cork stuck to it to do this. The mandrel is pushed into the cylinder and the other end clamped into the chuck.
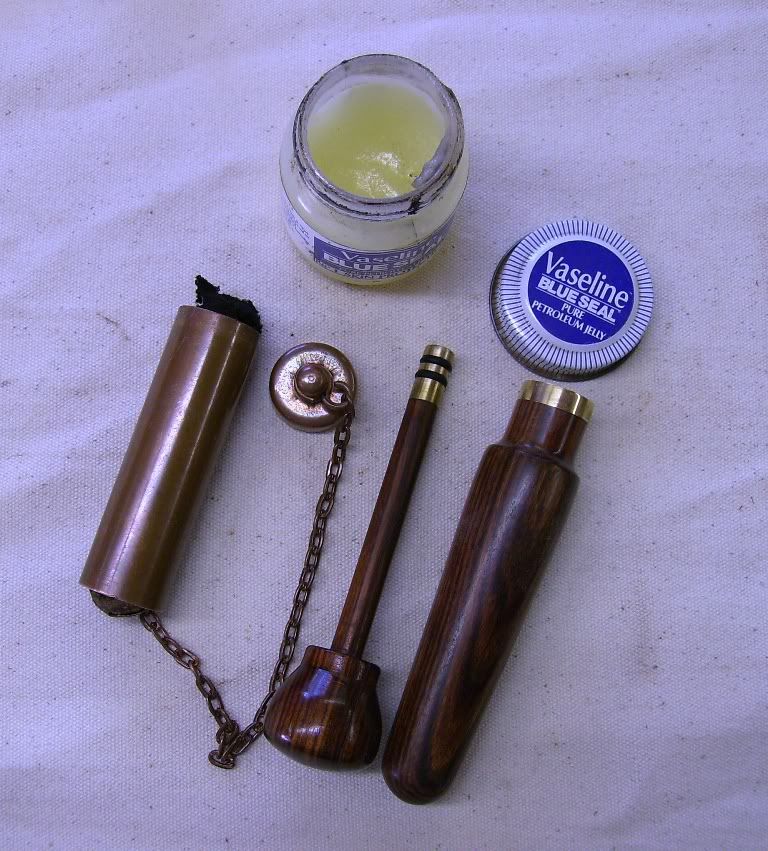
Here is my Firepiston kit
Have fun and let me know how it works out!
Bushbuck SA


